
ChromeOS has two task management systems. You can use both to manage your Chromebook’s RAM, battery life, and more.
Quick links
- How to Use the Main ChromeOS Task Manager
- How to use the Diagnostics app
Chromebooks and ChromeOS tablets offer much more than just a web browsing experience in 2023. The operating system has evolved to include many features that rival even macOS and Windows devices, like Phone Hub and even a video editor complete. One of the smaller features is a task manager.
Even though Chromebooks are known to be lightweight and efficient compared to Windows laptops and MacBooks, there are actually two task managers in ChromeOS that you can use to your advantage. One is fairly easy to access and designed to see the status of the Chrome web browser and other apps, and it can even kill problematic web pages. A secondary diagnostic app lets you view CPU usage and battery stats, view other system stats, and run diagnostics you’re likely familiar with from a Windows device.
So if you just got a new Chromebook or you’re already a Chromebook Pro, here are some tips on how you can use both to peek at system tasks and figure out why your Chromebook might be slow, and much more.
How to Use the Main ChromeOS Task Manager

The first task manager we’ll discuss ChromeOS in is what we’ll call the “main” task manager. This offers insight into your Chromebook’s overall memory footprint, CPU usage, as well as network usage. You even get a ProccessID to help you differentiate between Linux, Android, and Progressive Web Apps. This is the basic task manager to access if you want to end a malicious task or delete an unresponsive malicious tab or application.
- Open the ChromeOS Task Manager by pressing the Search button and Esc on your keyboard.
- As an alternative, you can open Chromiumright-click on the menu bar and choose Task Manager, also.
- There will be four basic columns. Task is the name of the task being executed. Memory footprint is the overall memory used by the application. Network indicates the amount of network used by the application. Process ID is the process identifier.
- To end an unresponsive process, first click on that process so that it is highlighted in blue, then choose Final process.
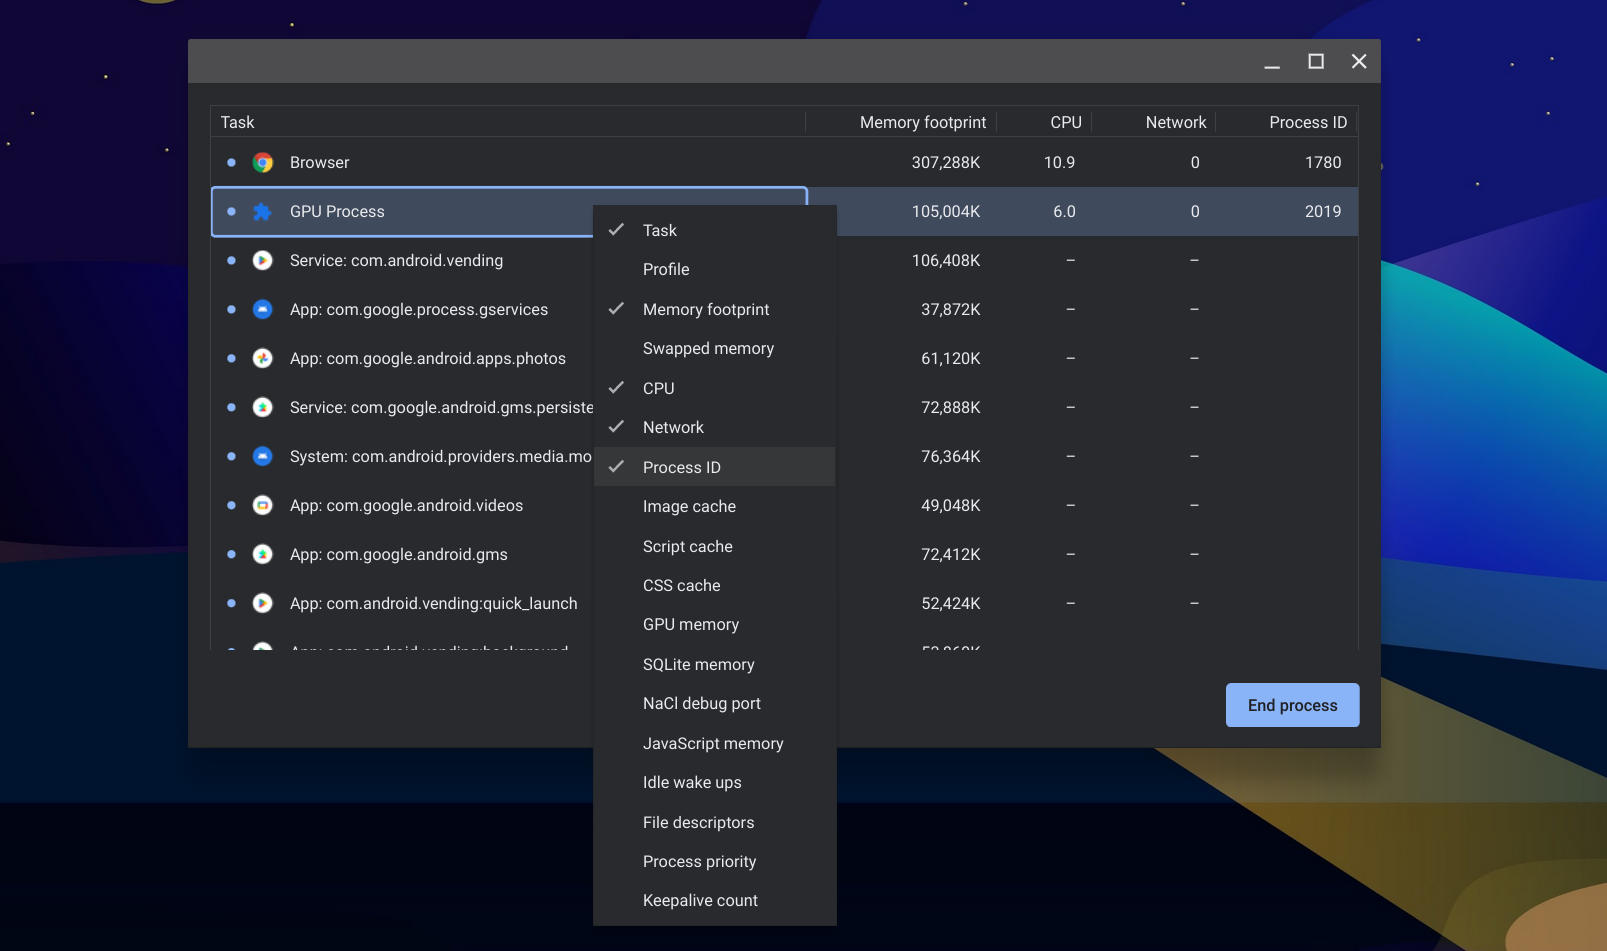
- You can add additional details to the task manager. Right click on any task and choose one of the selections from the menu. You can choose things like Profile, swapped memory, image cache, GPU memory, and more technical things like css caching or NaCi debug port.

That’s all there is to ChromeOS’ main task manager. It’s pretty basic compared to Windows Task Manager, but you get access to necessary functions, like killing an unresponsive web page or a Linux or Android app that might be frozen. When paired with the ChromeOS Diagnostics app, however, you can get a better overall look at system performance, as we’ll see next.
How to use the Diagnostics app

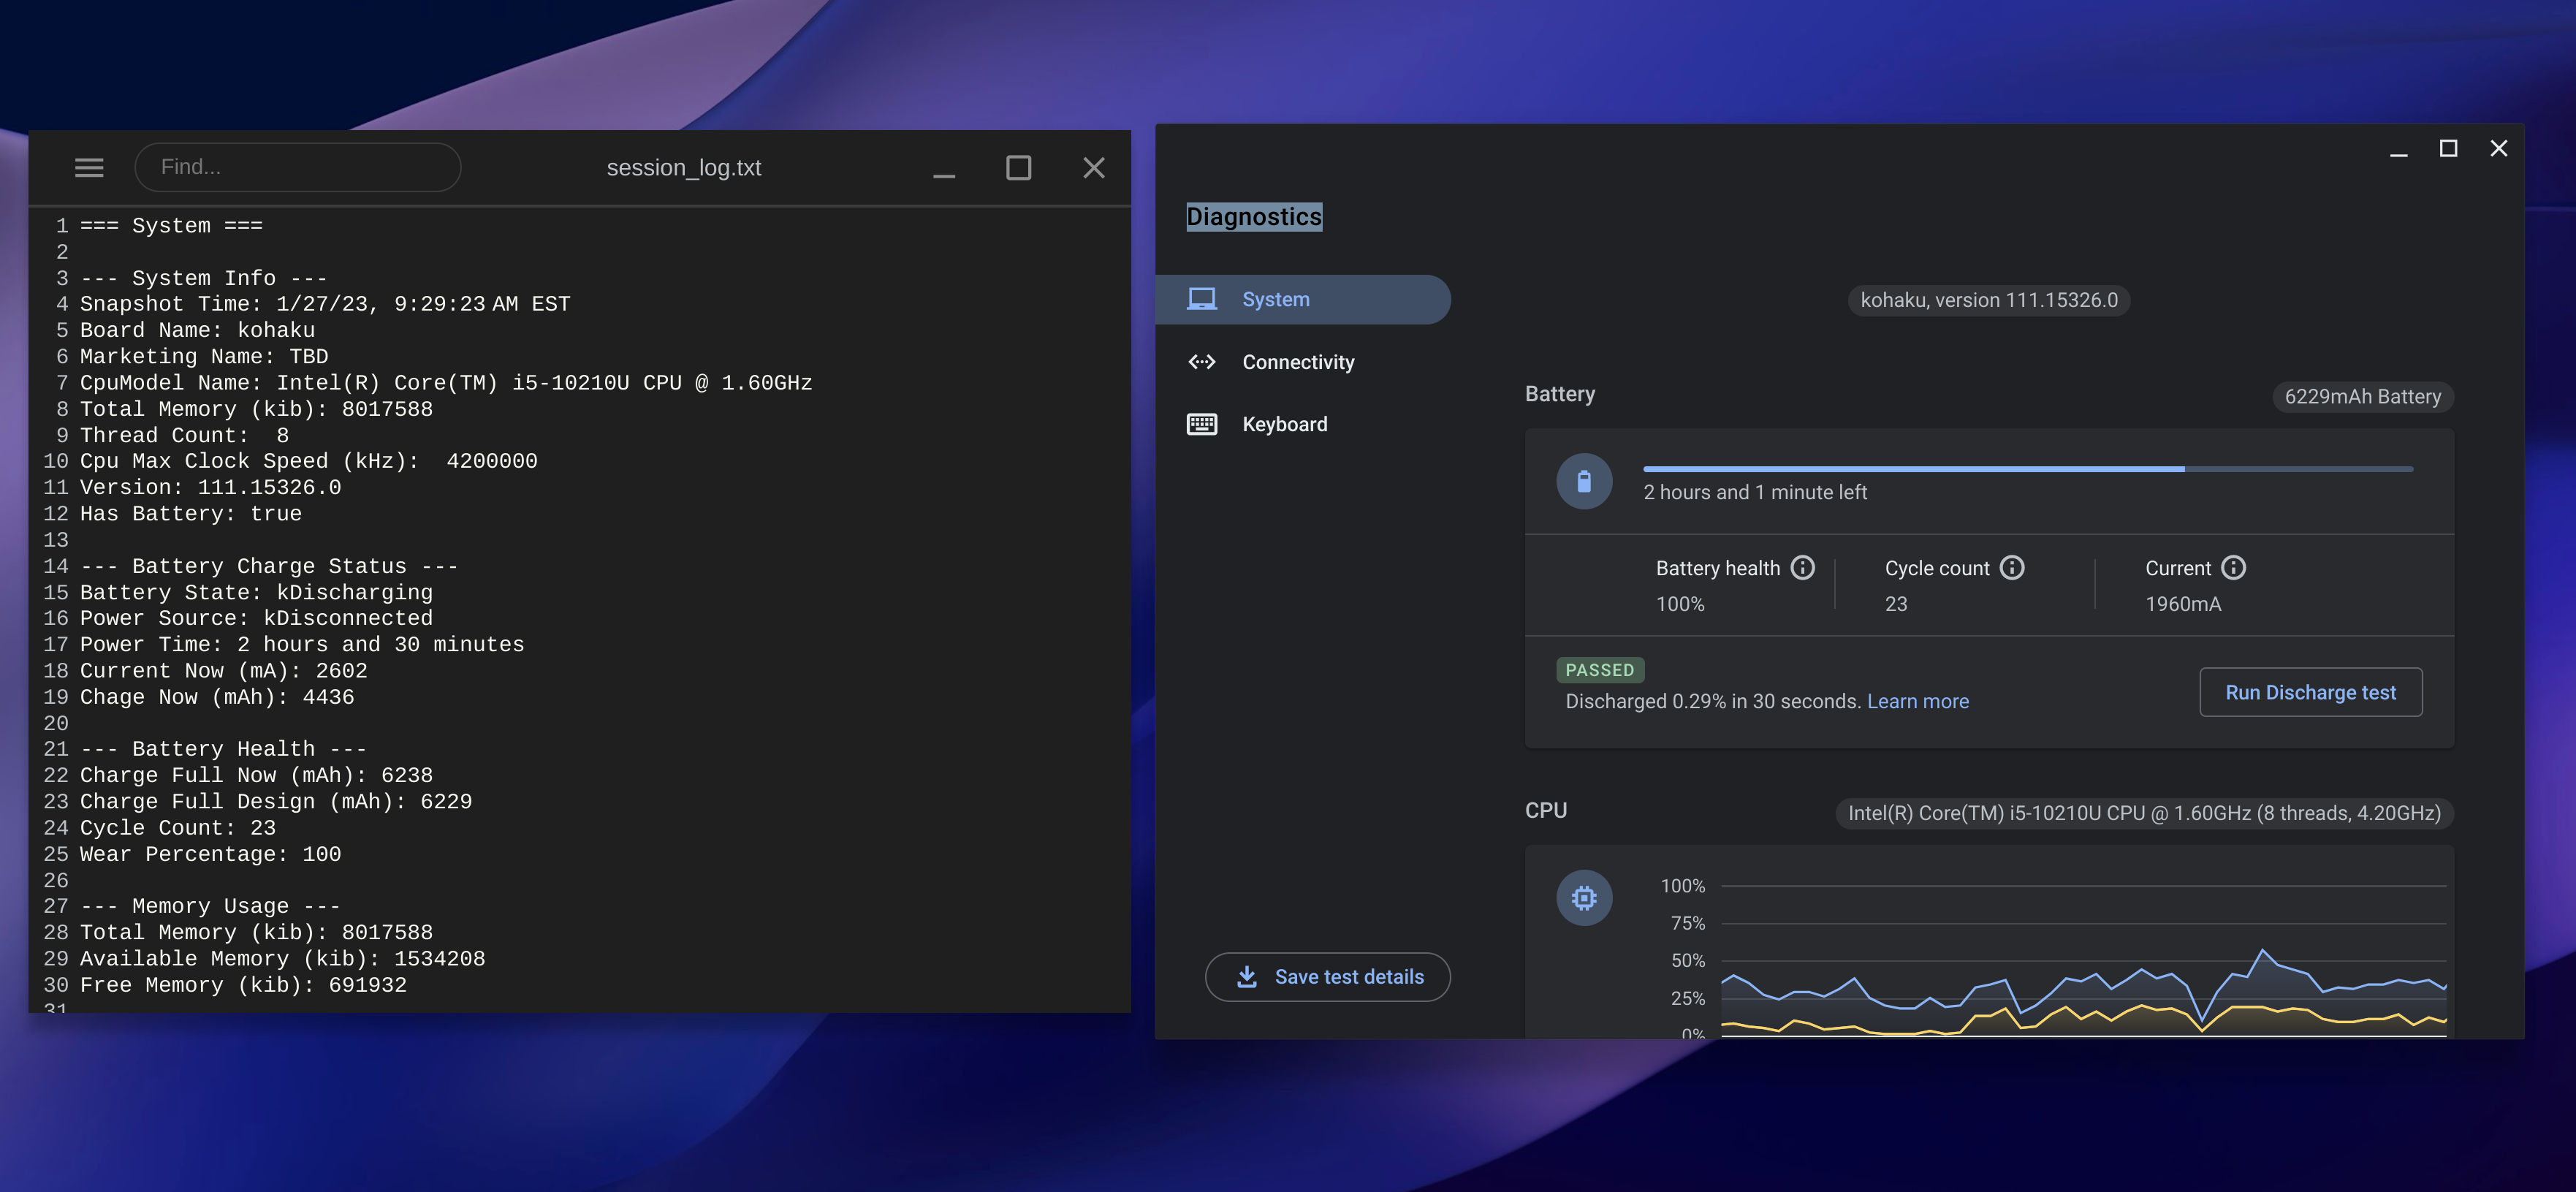
For a more in-depth (and graphical) look at how your Chromebook is working, you’ll want to use the ChromeOS Diagnostics app. This app displays things like a graph of overall CPU usage, battery status, and the amount of RAM installed on your Chromebook. Apart from that, you can also use it to view local network information like your IP address and SSID. Unlike the main task manager, however, there’s no keyboard shortcut for this one, and you’ll have to find it manually. Here’s how to start.
- Open the ChromeOS launcher by clicking on the circular icon at the bottom left of your screen. You can also press the To research or All button on your keyboard.
- Type the term Diagnostic and click on the first result.
- You will see the primary System left tab. Under Drums, you will see information such as battery size, battery life, discharge/charge status and cycle count. Then, under CPU, you will also see a graphical presentation of how the processor is being used. Memory This is where you see the amount of RAM used.
- For each of these categories, you can run diagnostic tests by clicking Run the test. ChromeOS will show you if it passed or failed. You can save the results as a .txt file by clicking Save test details. This can then be emailed to a technician or administrator.
- Under the Connectivity you will see basic network information.

So, if your Chromebook isn’t working properly or something seems slow, you can use Task Manager or the Diagnostics app to check the system status. It’s pretty easy, and there’s not much to do! Even though I use a Chromebook with 16GB of RAM, I often use the Diagnostics app myself to see how much RAM my Chromebook is using at any given time. I also like the battery diagnostics because it’s a great way to see how my screen brightness and browsing habits are impacting overall battery health.