The new Raspberry Pi Camera Module 3 offers exceptional image quality and a choice between a standard lens (75 degrees) and a wide lens (120 degrees). Even better, we now have autofocus. Taking pictures with the Picamera2 is easy, but sometimes we just want to press a button and take a picture, and appear in the picture!
In this project, we will use Blue Dot, a Python module, and an Android app to create a Bluetooth-controlled camera trigger. Thanks to Blue Dot’s easy-to-use library and Picamera2’s detailed structure, we’ll be capturing 1080p photos via a small amount of code.
For this project you will need
- A Raspberry Pi 3 or 4
- A Raspberry Pi camera
- An Android device
Installing the Raspberry Pi Camera Module
1. Open the camera port by gently lifting the plastic lock upwards.
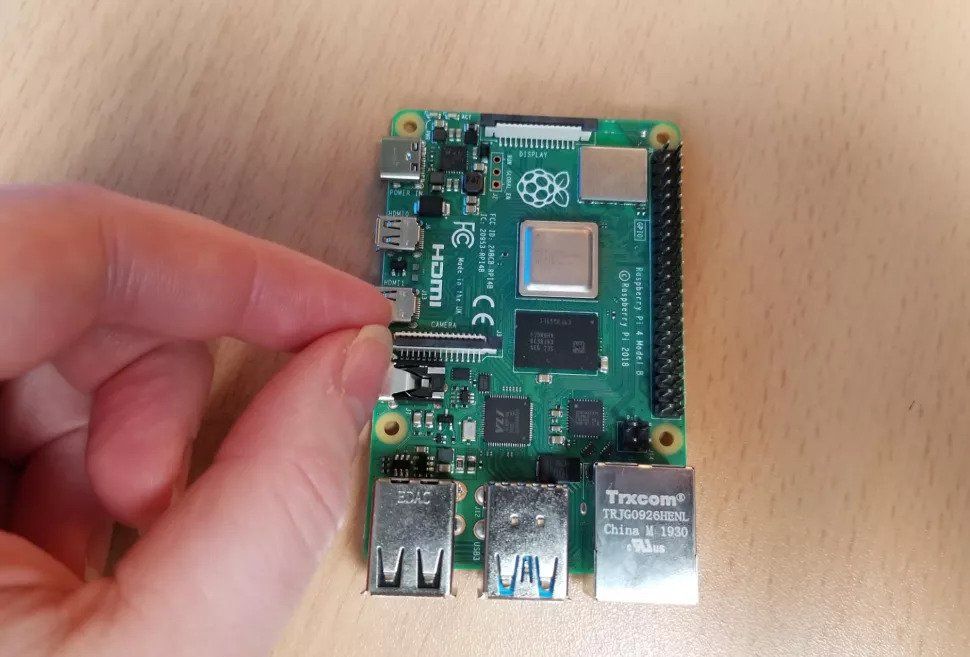
2. Insert the cable connector with the blue tab facing the USB/Ethernet ports. Raspberry Pi Zero users will need to use an adapter and connect the camera to the port on the right side of the board.
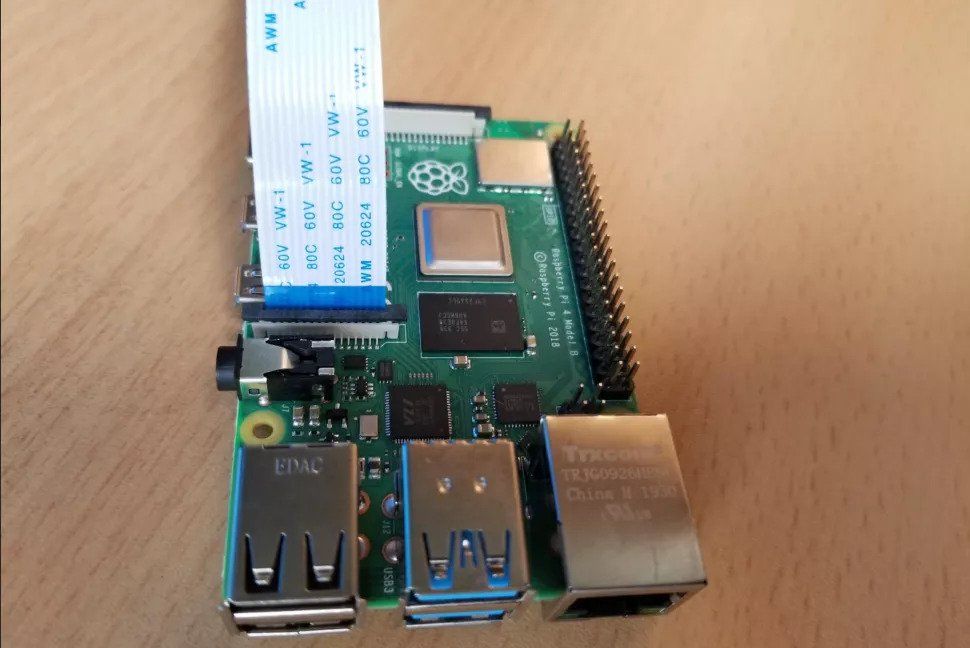
3. Close the connector lock and pull it very gently to make sure it is in place.
4. Turn on the Raspberry Pi on the desktop. Open a terminal and install the latest Picamera updates.
sudo apt update && sudo apt upgrade -y5. From the terminal, verify that your camera is working correctly. The libcamera command is handy for quickly verifying that our camera is connected and working as expected.
libcamera-helloInstalling the Blue Dot
Blue Dot is the creation of Martin O’Hanlon and provides a really easy way to remotely control a Raspberry Pi. The name “Blue Dot” stands for the large blue dot that dominates the Android device screen. We’re going to use Blue Dot as a big blue button to trigger the camera to take a picture.
1. On your Android device, open the Google Play Store and search for Blue Dot. Alternately Follow this link.
2. Install Blue Dot on your Android device.
3. On your Raspberry Pi, open a terminal and install the Blue Dot Python library.
sudo pip3 install bluedot4. Go to the Bluetooth menu, right click and select “Make discoverable”.
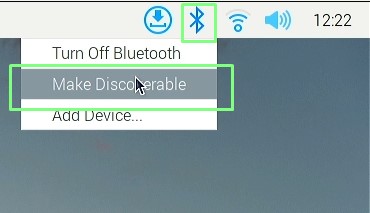
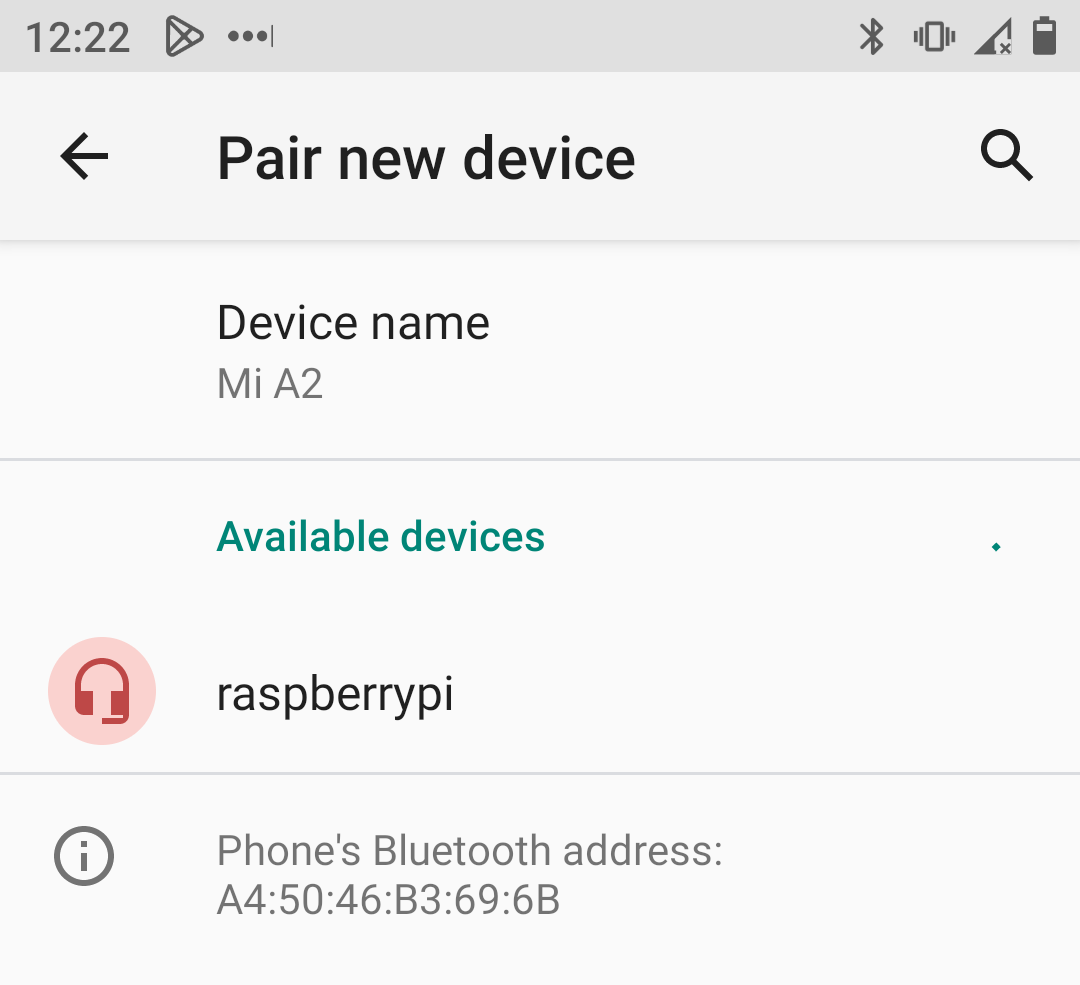
5. On your Android device, go to Settings >> Connected devices and select Pair new device.
6. Select “raspberrypi” and follow the pairing instructions. If your Raspberry Pi has a different hostname, then “raspberrypi” will not appear, search for your hostname.
With our Android device and Raspberry Pi now connected, we’ll write a quick Python script to verify that Blue Dot can communicate between the two devices.
1. Open Thonnyfound in the main menu under Programming.
2. Create a new file and import the Blue Dot Python library.
from bluedot import BlueDot3. Create an object, comic, which we will use to work with the library.
sudo pip3 install bluedot4. Wait for the user to press the blue button. This line of Python is a blocker. It will wait for the user to interact. When this happens, the code skips to the next line.
bd.wait_for_press()5. Print a message in the Python shell.
print("You pressed the blue dot!")6. Save the code as bd-test.py and click Run. The code will wait for a connection from our Android device.
7. On your Android device, open Blue Dot.
8. Select the hostname of your Raspberry Pi. This is usually “raspberrypi”.
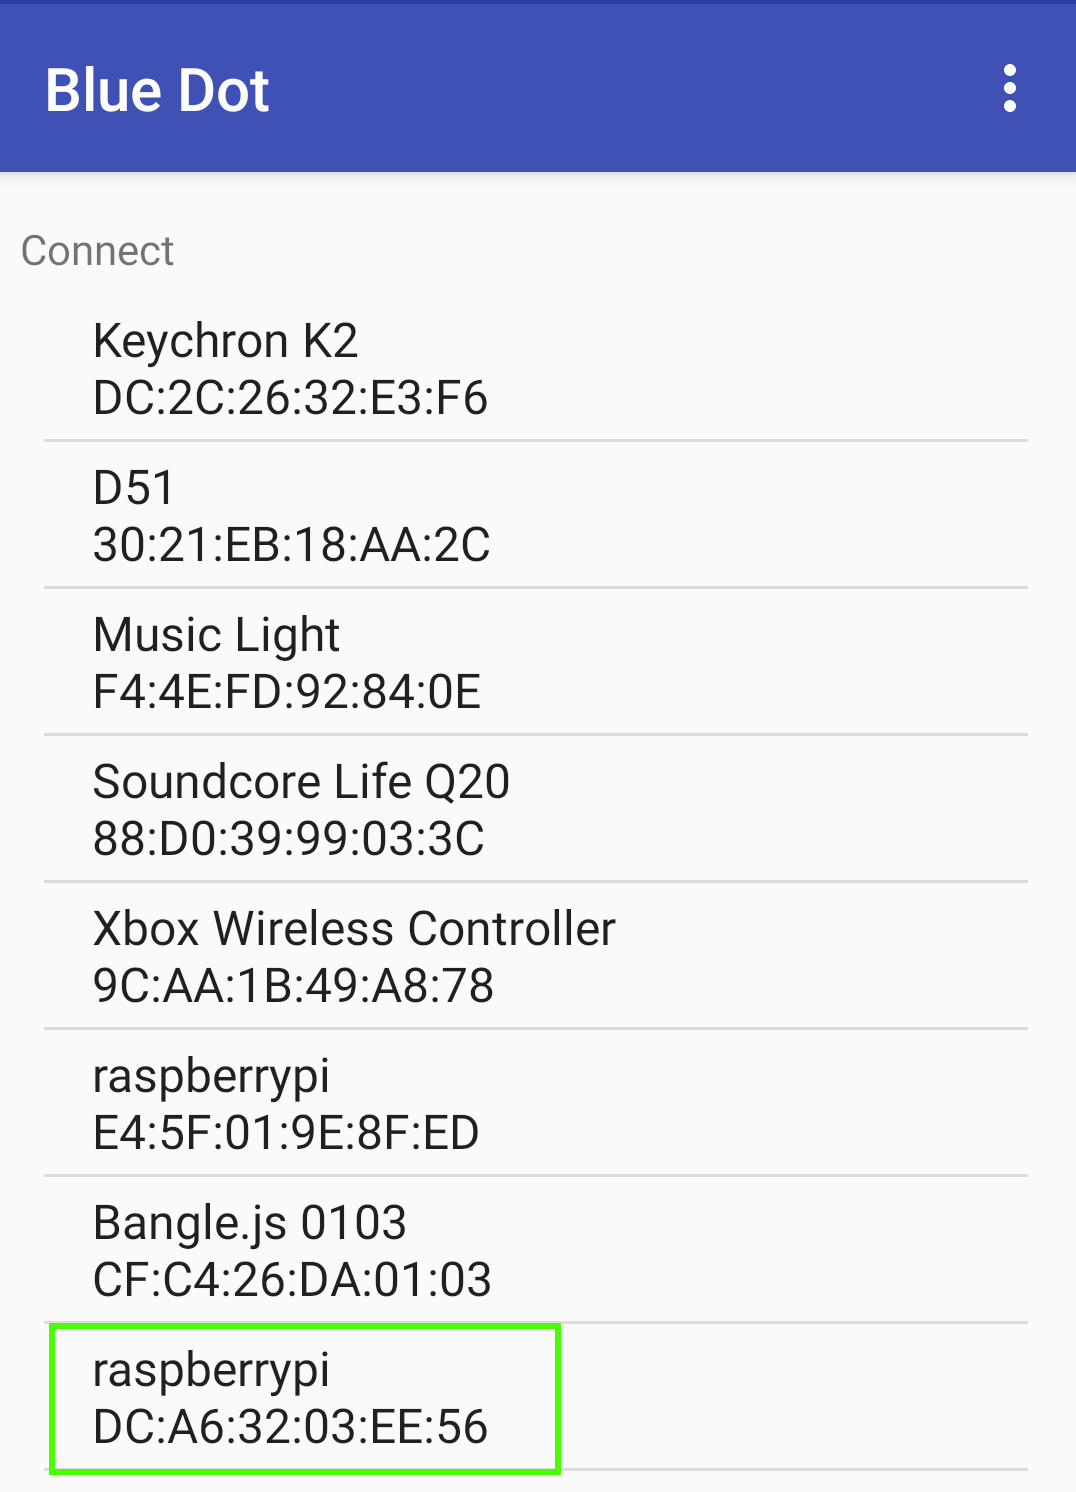
9. Click on the blue dot to trigger the Python code action. You should see a message in the Python shell.

Complete list of test codes
from bluedot import BlueDot
bd = BlueDot()
bd.wait_for_press()
print("You pressed the blue dot!")
Creating a Camera Trigger with Blue Dot
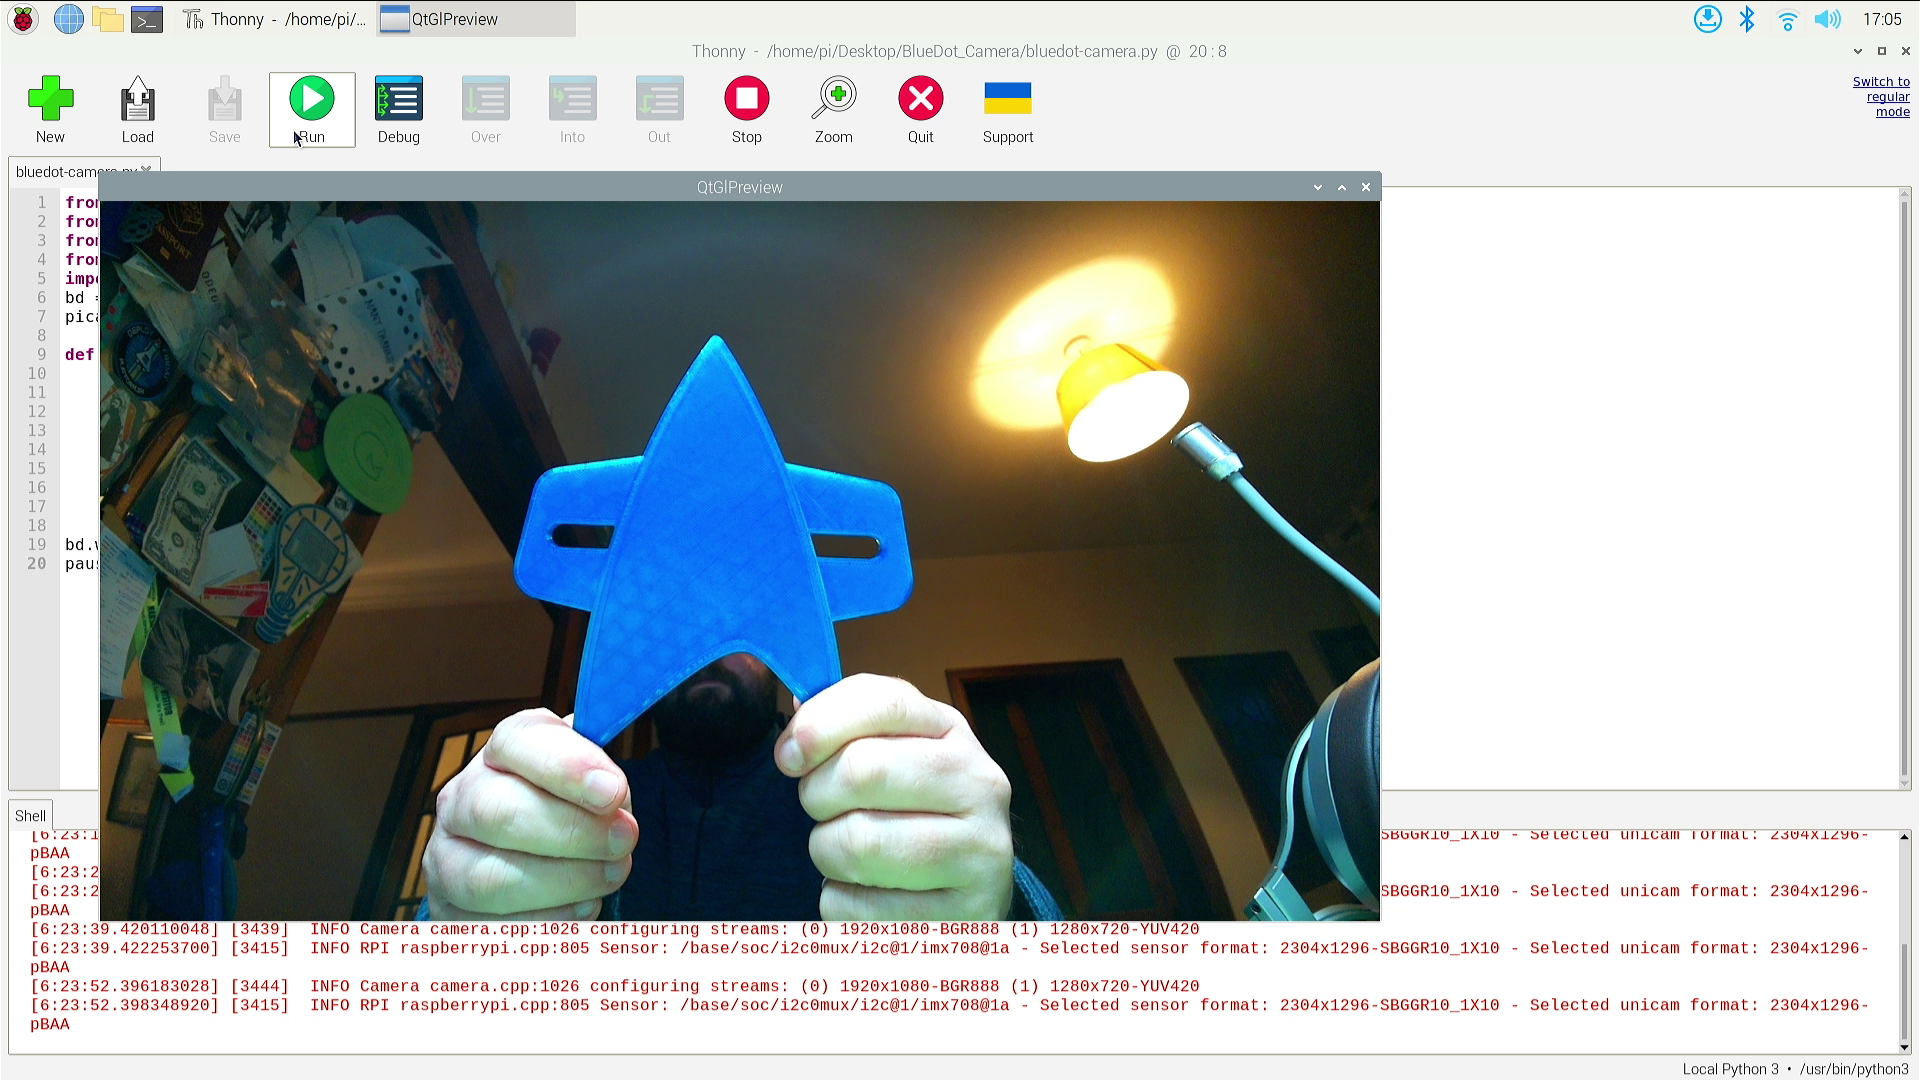
The goal of this project is to create a camera trigger with Blue Dot. When the button is pressed, a function is launched on the Raspberry Pi that manages the shot.
1. Create a new file and import the Blue Dot Python library.
from bluedot import BlueDot2. Import Picamera2 and libcamera. The preview class is used to generate preview windows, useful for framing a shot. The libcamera control class allows us to use autofocus with the new camera module 3.
from picamera2 import Picamera2, Preview
from libcamera import controls
3. Import the pause function from the signal, then from the time library. The pause will be used to prevent the code from exiting. Time will delay the code after creating a preview window, giving us time to frame a shot.
from signal import pause
import time
4. Create an object, comic, which we will use to work with the library.
bd = BlueDot()5. Create an object, picam2, which will allow us to easily use the Picamera2 library.
picam2 = Picamera2()6. Define a function, take_picture() which will be used to take a picture. Functions work by calling their name, which triggers the execution of all the steps in the function.
7. Create a configuration for the camera to take still images. This sets the image size to 1080p, while the preview windows will be 720p.
camera_config = picam2.create_still_configuration(main={"size": (1920, 1080)}, lores={"size": (1280, 720)}, display="lores")8. Configure Picamera2 to use the new configuration.
picam2.configure(camera_config)9. Start a preview window with 720p resolution. We define the position using the X and Y coordinates, otherwise the default is 0.0. Adjust this to suit your needs.
picam2.start_preview(Preview.QTGL, x=100, y=200, width=1280, height=720)ten. Show preview window.
picam2.start(show_preview=True)11. Set the camera to use continuous autofocus. Note that this only works with camera module 3.
picam2.set_controls({"AfMode": controls.AfModeEnum.Continuous})12. Pause for two seconds before capturing the image to a file called picam1.jpg.
   time.sleep(2)
   picam2.capture_file("picam1.jpg")
13. Close the preview window then stop Picamera2.
   picam2.stop_preview()
   picam2.stop()
14. Out of function, use Blue Dot’s “when_pressed” function to react to user input by executing the take_picture function.
bd.when_pressed = take_picture15. Use pause to stop the code from exiting.
pause()16. Save the code as bluedot_camera.py and click run to run the code. You will see the code is waiting for the Android device to connect.
17. On your Android device, open blue dot.
18. Select the hostname of your Raspberry Pi. This is usually “raspberrypi”.
19. Click on the blue dot to trigger the camera. You will see the preview window appear and then two seconds later an image will be saved to the micro SD card. Repeated presses will create a new image, but since the filename is the same, it will be overwritten each time.
Complete list of codes
from bluedot import BlueDot
from picamera2 import Picamera2, Preview
from libcamera import controls
from signal import pause
import time
bd = BlueDot()
picam2 = Picamera2()
def take_picture():
   camera_config = picam2.create_still_configuration(main={"size": (1920, 1080)}, lores={"size": (1280, 720)}, display="lores")
   picam2.configure(camera_config)
   picam2.start_preview(Preview.QTGL, x=100, y=200, width=1280, height=720)
   picam2.start(show_preview=True)
   picam2.set_controls({"AfMode": controls.AfModeEnum.Continuous})
   time.sleep(2)
   picam2.capture_file("picam1.jpg")
   picam2.stop_preview()
   picam2.stop()
bd.when_pressed = take_picture
pause()